Saturday, September 17, 2011

Fall Wreath

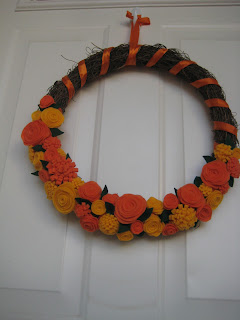
You know me, I love me a good wreath. I think I love making wreaths because they are easily changeable. I love walking up to a door and being greeted by a beautiful wreath.I have been seeing felt flowers everywhere and thought "How hard could that be?". Not hard at all, but time consuming! And with a 9 month old, time consuming projects take forever.

Here is the finished project.

Now I planned with only doing the rosette flowers, but while surfing the net (my favorite past time) I came up with another flower that looked really cute.

To make the rosette's, simple cute felt into a circle. The larger the circle, the larger the flower. You will then cut into the circle, in a circle pattern. Similar to the photo below.


Starting at the tip end, begin to roll the strip of felt in. I glued every few turns to hold it into place. When you get towards the end, the middle of the circle will fit as the bottom of the flower. The finished flower should look something like this.


The second flower I made is easier and quicker to make. You start with a strip of felt. Again the longer and thicker the strip, the bigger your flower. You want to glue the strip together length wise, so that the strip is folded in half, like below.


Once the strip is glued in half you want to cut small marks in the side of the strip that would be the folded side. (photo below)


Again, you will start gluing the strip and rolling it in. Similar to like rolling up a sleeping bag.


The finished flowers will look like the ones below ( not the rosettes.)


The only tip I can give is that make more than you think you will need. I did quite a few flowers with just 4 sheets of felt (2 orange, 2 yellow). Total cost of wreath- $1.50! I had the wreath and ribbon on hand from last Thanksgiving! I think it looks great.


Stephanie
Saturday, September 10, 2011

Thrifty Finds

SCORE!!!! At least that's how I feel about it. Me and baby got up semi-early this morning and I thought a walk would be great. Just before leaving I grabbed some cash (you never know when a lemonaide stand is calling your name or the ice cream man!). I didn't get two blocks before I hit my first yard sale. Yard sale, garage sale, moving sale...whatever you call them, they are great!

I missed the big day for one on baby clothes....tear,tear, but I found a few cute finds. And for super cheap! ( My favorite part) I thought, "why not keep walking and look for some more". I didn't think this through all the way. I had a nine month old, who was due for a nap in about 30 minutes and a small dog who has to stop and do his business at every tree in the neighborhood. But still I went into the great unknown of searching for finds.

After 5 yard sales and walking about 30 blocks, here are the great finds!


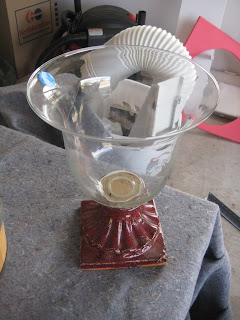
I found so much! The drink dispenser, stand, and 3 bowls to match was only $5. I can't wait to use that for Thanksgiving. The wooden bowl I plan on using chalkboard paint to cover up the "Popcorn" and use it to hold pine cones this winter.


My #1 buy for the day! I love this item. I plan on painting it black (to go with my kitchen). And talking them down to only  a buck was great too! (In fact that's all the money I had left...hahaha)


I love these pumpkins! All three for $5! And look whats on the back....


That's right! They are reversible. I love that in a decoration, two holidays for the price of one.

My husband is going to kill me when he gets home, but that's OK.


Thursday, September 1, 2011

Child Growth Chart

I made a growth chart for Lauren's daughter on her first birthday and knew I needed to do one for my daughter too! I love growth charts, they are easy to make and help you remember how little your babies once were. Now, my parents have been marking walls in their home for my nieces and nephews (and now my little girl) for years. I didn't want to mess up my walls so the chart was the answer.

I started by paying a visit to my local hardware store and picked out a ten foot 5 inch by 1 inch board. Make sure that the board is in good shape (no knots or bowing). I then asked them to cut the board in half (most places will do one free cut). One board produced 2 growth charts and it was only around 6 bucks.

Once I finally thought my daughter was tall enough for the growth chart it was time to think about how I wanted to decorate it. Her room is mostly purple and pink with butterfly's and ladybugs... Now this is cute for a baby but not for the young girl she will eventually become (I don't want to think about that). So I choose bright colors but still stayed with the butterfly's.

I painted the board white. A light color will help to see the markings of her growth easier.

You will hang the board 1 foot off the ground so your chart will measure up to 6 feet tall. After the paint dried, I marked the feet and inches on the board with permanent marker. You could use a coordinating paint color as well. I chose not to mark the numbers just yet (wanted to find the right color).


I found these vinyl wall applicants at Micheal's on sale for a dollar! They were so cute I had to use them.


After I put the vinyl butterfly's on the chart, I needed to be able to hang the chart on the wall. You can buy these push claw hangers at the same hardware store you purchased the board at.


Make sure that you nail the claw in at the center of the board.


The growth chart came out great! I love that it will be able to stay in her room, no matter the theme, until she thinks she is to cool for it! Just remember to nail the chart 1 foot off the ground and have fun keeping track of your child's speedy growth!