Wednesday, January 25, 2012

2 Valentine Project in 1 Day

So my Hubby is away for a few days for work and you know what that means....crafting without having to explain what you are doing or how much things cost! Love it! Well last night after the Bug went to bed I got the crafting itch and had to do something. I looked in our guest closet (aka my crafting center) and came up with an idea.

I am always looking for craft supplies on sale that I can pick up and I found a few wreaths at the thrift store for a buck each. I grabbed one of those, some Valentine material ( I bought on sale in the remnants pile at Joann's) and some extra tulle I had from the Bug's tutu last month and got to work!

Here is the finished project.


I got the sign from Ross years ago and it fit perfectly in the middle. I think I may make another for spring with some greens, tans and yellows.

My next project was really easy. All I needed was my trusty glue gun, some hearts that I picked up from the dollar store and ribbon. I made this tree for the Bird Baby Shower last spring.


The hearts were on sticks that I just removed then glued ribbon on to them to hang. Isn't the plate cute, Michale's for 2 bucks!


Somewhat Simple

Sunday, January 22, 2012

Remodel Done!...Well Almost

So yesterday was spent trying to finish our master bathroom remodel. It's only been 4 months to complete, and that's a good timeline with our crazy schedules. We would have had it finished about a month ago if a person ( how should be remain nameless....OK it was the hubby) didn't make a $60 cut mistake on the trim for the mirror. I really blame myself (and he also blames me) because I was not in the garage while he was cutting to make sure that he was cutting the correct angle on the trim.

Anyways, after the long awaited trim arrived yesterday (3 weeks is way to long for a piece of trim if you ask me!), we got to work. And some choice words and some yelling and the mirror, it finally came together. Its not a professional job, but its our first remodel on our home and I think we did a good job.

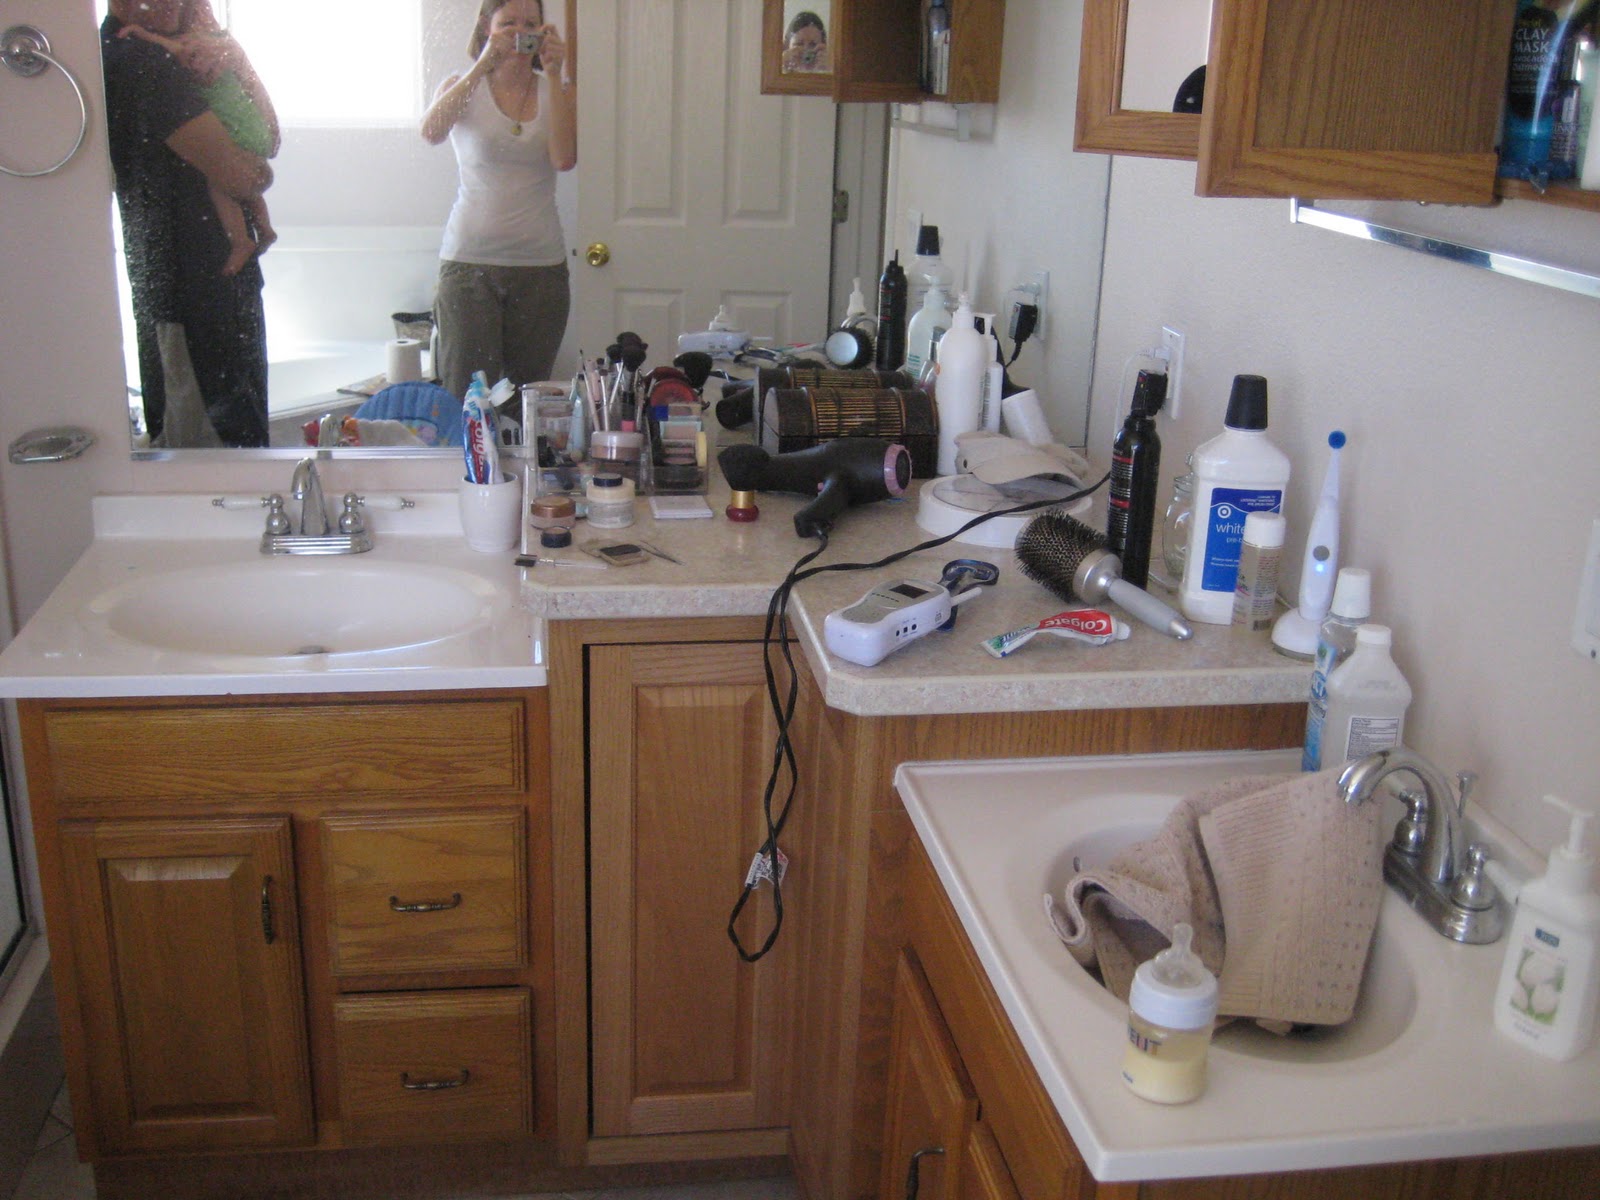
Here is the before shot of our master bath (I forgot to take the guest bath photo). Please excuse the mess.


Not sure if short people lived here before we bought the place but the sinks were entirely to short. As it turned out, the previous owners remodeled the bathroom to look like this! They took two stock vanities and added an extra kitchen cabinet as the middle to create counter space and storage. This kitchen cabinet is a typical corner unit with a lazy Susan inside. It is also 4 inches taller than the vanities. Now you know why this was my first request to remodel. I am also a matchy-matchy person, so if we remodeled the master, we had to remodel the guest to match!


Sorry for the photo being dark, but I wanted to show that we also had hideous light fixtures in both bathrooms. The stock dressing room bulbs, yuck! They looked something like this:


Again, YUCK! So of course I had to change those. Also, we decided at the last minute and I mean last minute. Hubby was doing demo and said "If you want to paint, you need to do it now before I put the cabinets in tomorrow. So off I run to Lowe's to find paint. I choose a color by Olympic paint color called Camel, the one on the Left. It turned out really nice.


Look at the Hubby working. It took forever to get the demo done and the new cabinets installed. Main issue was the previous owners had no clue how to do anything! We had planned on saving the old mirrors but they were too low for the cabinets, so they had to go to. That part was nice, a little stress reliever.


We still wanted two sinks in the master bath, so we had to go with and "L" shaped counter. Because of this we had to order custom cabinets, but they turned out great! We got the Thomasville line which are actually kitchen cabinets, but I still love them. Here is a photo of them in the store.


Love this color! It turned out to be almost a light Carmel color. We also ordered some window trim to frame out the new mirrors that we had mounted.We added granite counter tops and under mount sinks!

We ended up going with a brushed nickel finish on all the hardware and lights. We choose these light fixtures for both bathrooms.


And all the accessories for the bathrooms came from Martha Stewart's line at Home Depot, here is a shot of the towel bar.


So here is the finished product!


Our Guest Bath


I love the way they turned out! My Hubby did a great job. Can't wait to get started on the kitchen next.


Friday, January 20, 2012

Valentines Day Projects

I know its still January, but I love Valentines Day! My hubby hates it, maybe that's why I go out of my way to decorate the entire house. So there are a feel projects I still have in the workings, but I thought I would do a recap of what has been accomplished and what has inspired me so far!

Just finished this burlap wreath with some tulle to hang on the back door. Super easy and all from scraps I had laying around the house.


The Valentines Day felt garland ( tutorial found here).


And of course some projects and recipes that I would love to be starting....but may not get finished.


Cute X and O cupcakes with red hots from Martha Stewart


Painted wine bottles from Griffiths Rated

Cherry Marshmallow Crispy Treats...Yummy! From Inside Bru Crew Life


I love these blocks! From Bits Of Everything

Enjoy!

Wednesday, January 18, 2012

Hair Bow Frame Tutorial

So I finally found a frame that I liked for my daughters hair bow holder, not to mention I have had this on my to-do list for some time! I found the frame a few days ago ( it was shown here) and knew it was going to be great. I choose pink and some cute ribbon I picked up at a going out of business sale (wish I would have picked up a lot more too!). Total cost- about 3 dollars!


I painted 2 coats of pink onto the frame, I wanted a little bit of the dark wood color to show threw.


After the paint dried, flip the frame over and measure the size to determine how far apart your ribbons should be. Make sure to take the size of your bows into account. My daughter is still a baby so here bows are smaller. I measured about an inch between each ribbon. If your daughter is older ( and with bigger bows) maybe try 2 inches.


I hot glued the ribbons into place. Make sure you pull the ribbons tight, you don't want any slack.


I also had a bit of ribbon left over so I used it to hang the frame.


Enjoy!

Tuesday, January 17, 2012

Valentine Heart Garland

I saw this project on Pinterest and thought how easy it would be. Most of the images I pin on Pinterest, I probably will never get around to completing, but this one is finished. And even before the holiday too! I am on it this week!


This garland is super easy to make (not to mention cheap!) and you could do it in any colors you want. For Valentines Day I choose white, red, and pink. Here are all the items you will need:

1 8x11 piece of felt from any craft store in white, red, and pink. (3 total)
* Each square will yield about twelve 1 inch heart.
Sewing machine
White yard (or any color you like)

Step 1- Fold the piece of felt length wise, so the piece looks like a long rectangle.


Step 2- Now that you have the piece of felt folded, you are going to pin the folded side together about an inch from the fold. ( please see the photo)


Step 3- You will sew a line about 1/2 an inch in from the fold then entire length of the felt.


Step 4- Now that you have sewn a seam down the felt, you will turn the felt inside out. You want the seam inside the felt heart. Match the two ends together and pin.


Your felt should look something like this when you have the two ends pinned together.


Step 5- Now sew a seam to join the two end pieces together. About a 1/4 of an inch in from the edge.


Step 6- Once you are done sewing, cut felt into 1 inch pieces. One piece of felt should make between 11 and 12 one inch hearts.


This is what it will look like once you have cut them.


Step 7- String the hearts together with yarn or wire. I used a quilting thread but I may redo mine with yarn. The thread just didn't have the strength to hold as many hearts as I wanted.


I love it! So simple and yet so cute.


What do you think? I think hot pink and blue would look cute. Or maybe green and pink.....Maybe next year.


Craft DIY Ideas

Saturday, January 14, 2012

Lemon and Black Berry Bunt Cake

Yesterday was the Hubby's birthday! I love making his birthday cake, last year was a White Chocolate cake (which he loved) and this year I made him a Lemon cake. We both love anything lemon and I found this recipe in one of my desert cookbooks. I have a bad habit of making a new recipe for a semi-important moment, but so far I have had no let downs. The Hubby loved it (just thought it used to much cream cheese).

This recipe was a cupcake recipe and had a meringue topping...I also have a bad habit of tweaking recipes a lot too. I made the cake according to the recipe and the filling too, I just changed the method of cooking and the topping.


Here's the recipe:
Cake
1 box of yellow cake mix
1 1/4 cups of lemonade
1/4 cup lemon curd (I couldn't find lemon curd and used lemon pie filling)
1/4 cup canola or veggie oil
1/4 cup lemon zest ( about 2 lemons)
3 eggs

Mix all together and pour into a greased bunt pan or 2 9 inch round cake pans.
Bake at 350 degrees for about 38 minutes or until a tooth pick comes out clean. * Note that this cake will not be a fluffy cake so don't be scared if it does not rise to the top of the pan.

Filling
3/4 cup cream cheese
3/4 cup lemon curd (or lemon filling)

Beat cream cheese until smooth. Add lemon filling and beat until mixed well.

After the cake cooled, I sliced the bunt cake in half. I then scooped out a little bit of the cake on the bottom layer for the filling to sit in. I layered the filling and placed the top layer back on. I reserved about 3/4 cup of the filling to put on top of the cake and then topped with the black berries.


Enjoy!