Saturday, January 14, 2012

Find of the Year!

Thrifty finds is back again and I have found the find of the year, and its only January! I thought about going to our local DI ( or Desert Industries, its like a Goodwill here in UT) today and when I got there, everyone had great things in their baskets! I walked around and found a few items. I finally found a frame for the hair bow holder I have been wanting to make ( only 50 cents!). Also a great wire basket for the house, again only 3 dollars. And I can never have enough wreaths, can you say Valentines Day decor....


But the find of the year has to be this great small cabinet that I am going to make into a kitchen for my little girls room! It was only 15 bucks! 


I had to fight off some other women looking at it, but it was worth it. I can't wait to get started and show everyone the progress! Its about 3 feet tall and all the draws are in working order and close completely. There is also a little pull out cutting board! I am going to make the hubby drill a hole to make a sink and I am going to add a fake burner! I can't wait. Here are some photos that I am turning to for inspiration.


Stay tuned for updates in this one!

Stephanie


HOG

Friday, January 6, 2012

Not Your Mothers Crab Salad

We have all seen it, that blob of "Crab Salad" at the supermarkets deli counter. The one that looks like it has more mayo then anything else in it....The way the world is, either you like imitation crab or not. I for one think its a great alternative when you can't get or afford the real thing!

I have seen many different versions of crab salad, my mothers for one is an actual salad with crab and mayo as a dressing. While its good, I prefer my salad more.

Here is the recipe:
1 package imitation crab (8 oz or more)
1/2 of a cucumber- peeled and diced
1/2 green bell pepper- diced(feel free to use any color)
1 medium jalapeno- diced
1/2 small red onion- diced
1 lime juices
3 tablespoons (or less) of Light Mayo- just use enough to bind your salad together.
1/2 teaspoon chili power
1/2 teaspoon garlic salt
black pepper to taste

Really the only thing you have to do is shred the crab with my hands and dice the veggies. Mix all together with the mayo and spices. I usually refrigerate for an hour before eating.

I either eat as is or with Wheat Thins.

Enjoy!


Thursday, January 5, 2012

Birthday Lollipop Basket

My hubby's 30th Birthday is next week ( that also means I will be 30 this year too, but we are not going to talk about that!). And even though we have agreed to save our money and go on a trip with our best friends ( also turning 30, we are Vegas bound!), I still have to do something. Maybe cook his favorite enchiladas or something, but I thought I would surprise him at work with this.


I have been seeing this all over Pinterest (I am addicted to that website!). I thought they are so different and would be great for a guys since most, if not all don't like getting flowers.

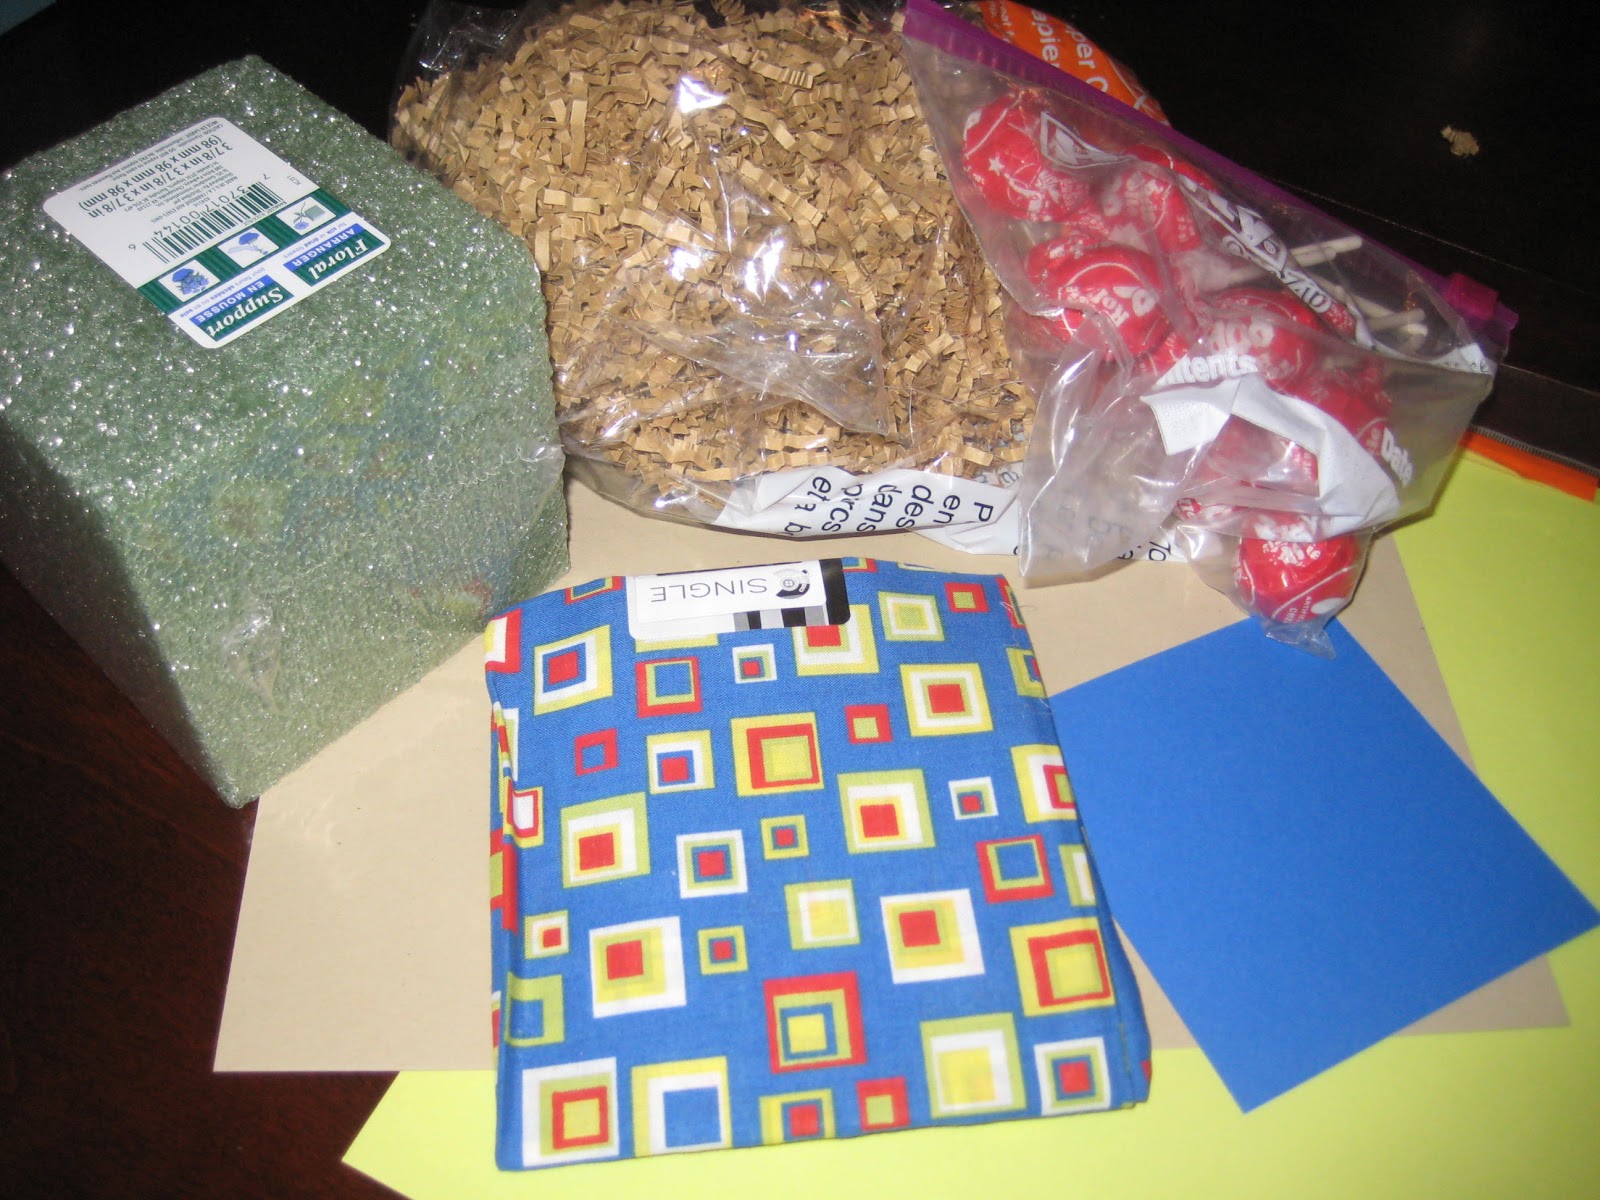
I started with mostly products I had on hand. I saved all the Tootsie Roll Pops from our Halloween candy (I am sure they are still good...) because I knew I wanted to do this project. The only thing I had to go purchase was the foam block, which was a buck at the Dollar Store.

Here is what you will need:
A foam block- any size will do
Candy or Lollipops (really anything on a stick)
Fabric or scrapbook paper to cover
Glue


I had fabric on hand and cut it to fit around the four sides of the foam block. I then hot glues the fabric on to the block. Please do not do the rookie mistake I made and make sure that your glue gun is on low heat... I think I heard the foam block bubble at one point.


After the block is covered in either paper or fabric, I made my sign out of card stock that I had on hand.


As you can see, I still have not shelled out the money for a Circuit or other vinyl machine. I want on really bad but can not convince my hubby that its worth the money...one day! So I hand wrote the message on the card stock and glued it to the fabric.


I did not have enough Tootsie rolls to completely cover the foam that would show so I glues down some crinkled paper. You can find this at any craft store (I pick it up at the Dollar Stores for gift baskets and such).


Then stick your lollipops or candy into the foam. Just be sure not to push too hard, I think I may have bent some. One tip for future projects, I grabbed the harder foam block and not the floral (softer foam) block. I think that the floral foam would hold the lollipop sticks better.


What other holidays or celebrations could you use this project for, the possibilities are endless.
Valentines Day with heart lollipops would be a great one to try, let me know!


Somewhat Simple

Wednesday, January 4, 2012

Chili Rellenos Casserole

As I have mentioned, I am on a healthy movement right now. I don't mean raw food only served with water or anything like that, just trying to make our everyday meals a little lighter and me more healthier. I came across a lighter take of Chili Rellenos. The traditional version is chilies stuffed with cheese and fried (yummy but not really figure friendly). This recipe is more of a quiche and so good! Even the hubby loved it.


Here is the recipe:
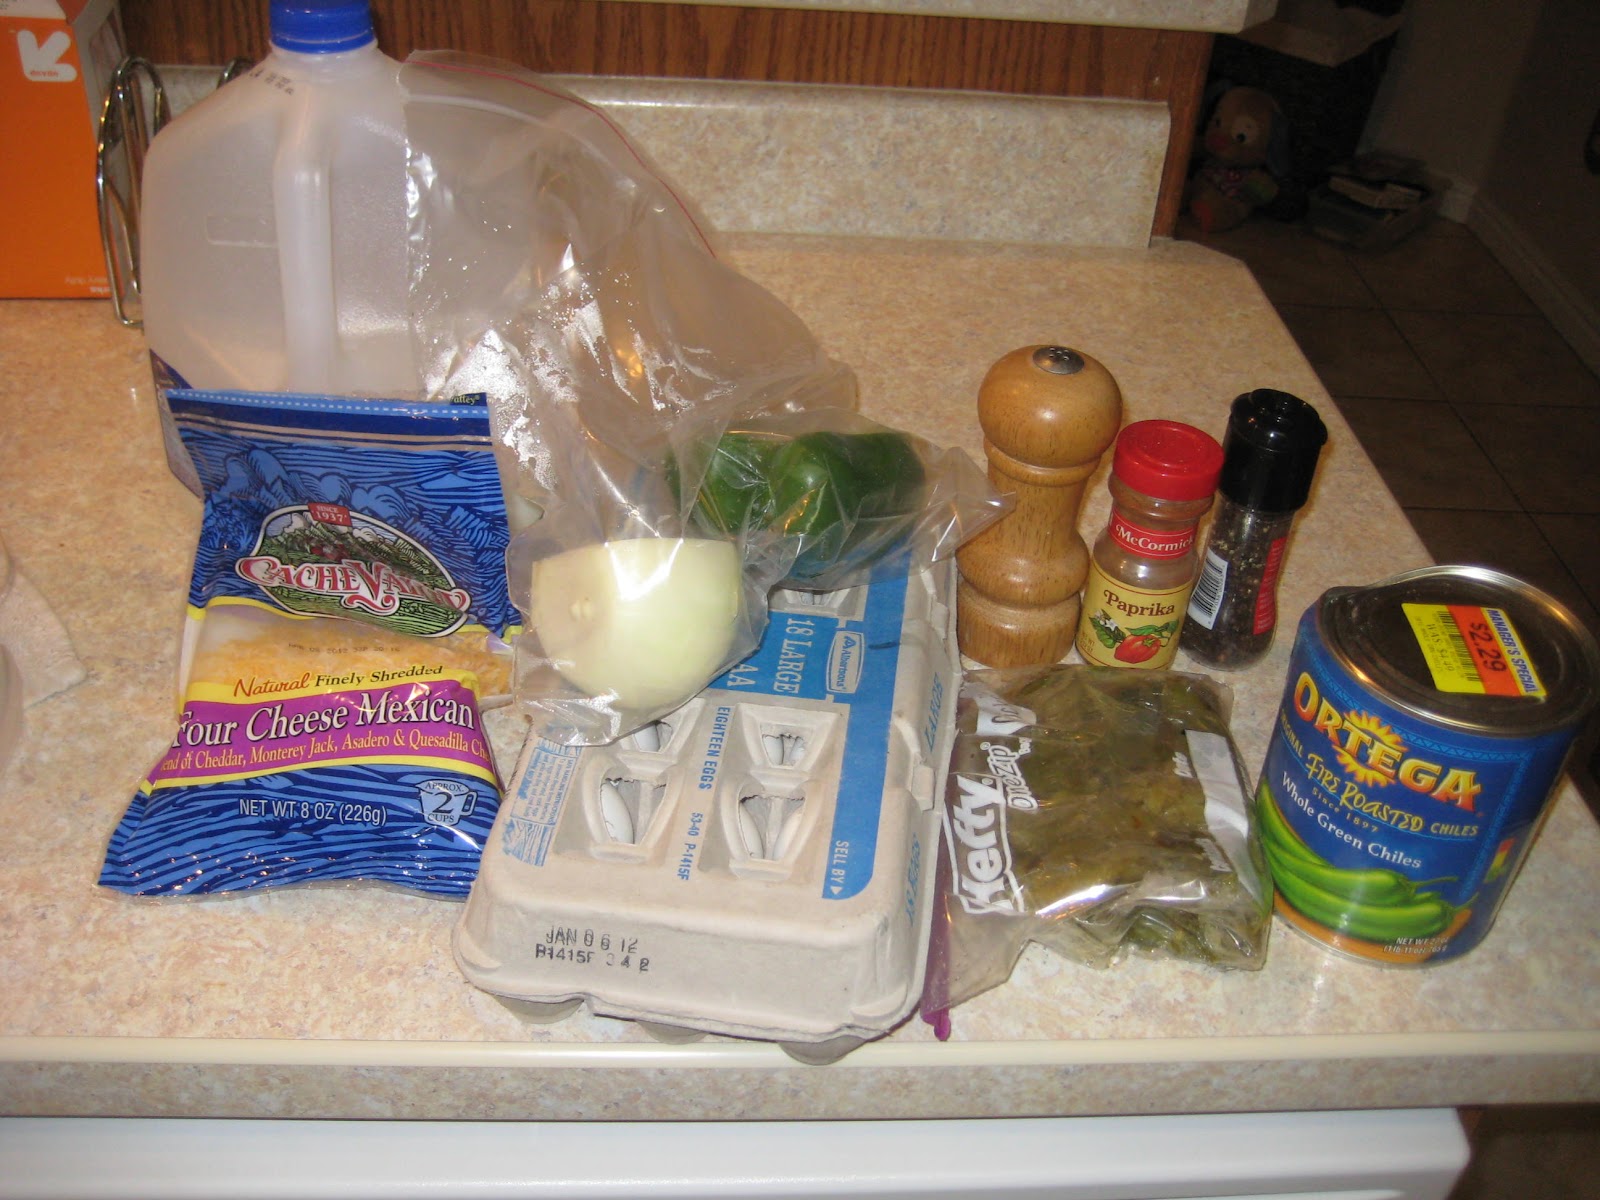
  • 6 large eggs
  • 1 cup(s) (2%) reduced-fat milk
  • 2 tablespoon(s) all-purpose flour
  • 1/4 teaspoon(s) sweet paprika
  • Salt
  • Pepper
  • 2 can(s) (5.75 ounces each) whole green chile's, drained and thinly sliced
  • 1 medium (8 to 10 ounces) red pepper, cut into 1/4-inch pieces ( I only had green on hand)
  • 4 ounce(s) extra-sharp Cheddar cheese, shredded
  • 1/2 cup(s) packed fresh cilantro leaves, finely chopped
Directions
  1. Preheat oven to 350°F. Grease shallow 2-quart ceramic or glass baking dish.
    2.   In large bowl, with wire whisk, mix eggs, milk, flour, paprika, 1/4 teaspoon salt, and 1/2 teaspoon     freshly ground black pepper until well blended. Stir in chile's, pepper, Cheddar, and half of cilantro; pour into prepared dish.
    I only used 1 can of green chilirs and then substituted my own homemade roasted green chilies that had more heat. Also, I only had green peppers on hand.
   3. Bake casserole 35 to 40 minutes or until puffed and golden brown and center still jiggles slightly.
    I added some home fries to go with the meal. It was a great and surprising filling dinner. And did I mention is was only around 305 calories per serving and 20 gm of protein! *This is a dish for 4 servings.
    I plan on trying another version, maybe with spinach, mushrooms and Swiss cheese. What do you think? Any variations you can think up, let me know!


    Somewhat Simple

    Tuesday, January 3, 2012

    2012 Plans- Get Healthy

    The first posting of 2012! Wow, I still can't believe that 2011 is over. It went by so fast. I have thought about what I would like to do in 2012 and what I need to do in 2012 (needless to say they don't really match up, but we are going to try!). I am turning 30 this year (along with my husband) and I have come to the realisation that I have been lazy for the past 30 years and I do not want to be like that anymore.

    With recent health problems in my family, I need to start taking better care of both myself and my family. I know that most people who make New Year Resolutions to get healthier usually fail, but I am going to try hard not to. Now, I am not over weight and but I know I am not healthy. And that is my plan. To get healthy!

    My hubby is planning on running his first marathon after his 30th birthday! I am super excited for him and I know he can do it. He has inspired me to try to run a 10K before my 30th birthday in September. Now this may not be a big deal for some people, but for a person who has never been a good runner, this is huge!

    I am starting my journey with changing our diets with portion control and healthier foods. Making more of our foods with healthier ingredients and trying to stay away from the fast foods that also seem to creep in to our lives. Also, I am planning on starting more outdoor exercising....we will see if the weather cooperates with me.

    I will let you know how my journey goes and would love feed back from you too! Helpful hints, good recipes for healthy food, and encouragement is always welcome. Here are a few hints I have picked up already.

    This tip is from a great blog! http://downtownn.tumblr.com/


    Wednesday, December 21, 2011

    Birthday Rag Quilt

    Okay, I finally finished the quilt I started some time ago for my baby's first birthday....I was only about 2 weeks late. It was time consuming and I had to take several breaks. My next quilt will probably be for a special someones 2nd birthday....but we will see. I for sure need to buy a rotary cutter first!


    Here are the materials I choose. I wanted to do lady bugs (which is what I want to do the baby's room in once I get everything together). Right now there are lady bugs and butterfly's but the room was decorated in a hurry due to the fact that we planned on a boy, not a girl (long story....). Any who, I wanted red and black but no such luck. So I found a print with a lady bug on it and went from there. The colors turned out to be pink and green.

    With this quilt pattern, I needed a front and back to each square. I choose 5 patterns for the front (all in cotton) and 4 patterns for the back (all in flannel). All in greens and pinks.


    Figuring out how much material was one of the hard parts. A suggestion- draw out a plan first. Figure how many square you are making and in what pattern the quilt will be. I choose 5 inch squares (that would become about 4 inches on each side when finished) and 9x12 in rows.

    I cut out all the squares (again I wish I had a rotary cutter!), plus batting to put in between the two squares. The batting was 4x4 and all the squares were 5x5.


    I then laid out all the cotton squares out in the pattern that I wanted. I had to use a bed (my floor in my crafting room was not big enough and I needed it high enough away from prying baby fingers).


    Its not shown but after one side was laied out, I turned them face down and put the batting on the square. Then I arranged the flannel squares (facing up) over the batting the the pattern I wanted.
    This is what it would look like.


    After I pined all the squares together, I began the huge task of sewing them all! I went row by row to make it simple and to keep the pattern correct. I sewed an "X" into the square, making sure to leave about a half of an inch from each corner.


    After all the squares from one row were sewn with the "X", I could connect then together. I choose to make the cotton fabric facing up and with the clean stitch. I pinned two squares together at one end, making sure that the cotton fabric was facing each other and sewed a straight line down one side. Once all the squares were connected in a row, I moved on to another row, repeating all the steps above.


    Once I had a few rows together, I could sew the rows to each other. I pinned the two rows together on one side (always making sure that your pattern is correct and that your cotton fabric is facing each other). This is why I have not sewn the squares from corner to corner and left the half inch open. This allows you to sew the squares and rows together and get the ruffled effect at the end.


    After all the rows are completely sewn together, I sewed the edges all the way around the quilt. When you are finished one side will be clean edges (cotton) and the other side will have the ruff edges (flannel). I then cut little snips into all the ruff edges. This is so when I washed the quilt, all the ruff edges would fray and become softer.


    For my first quilt ( first real sewing project, really) and no real teaching, I think it turned out pretty well. Now I am going to make a pillow with some left over fabric to match it.


    Christmas Gifts

    I was determined to make almost all of the Christmas gifts this year and I came very close to completing my goal. I will post most of them, but here is a sneek peak.

    I made this for Lauren's little girl (shh....don't tell her!). It was super easy! 


    Heat and Bond is a great product. It allows you to cut any shape out of material and bond it to almost anything. I think I may be making some monogram pillow for our bed once I find the right colors.


    After ironing on the material, you just cut out the shape you would like. I choose the siloute of a bird.


    After ironing on the bird, I added some buttons for a little bit more tecture. This shirt along with a book is the perfect little gift for my little buddy!